SloStudio (along with several others) is sponsoring a Finish-A-Long for 2016 to motivate those of us who need to finish up some long overdue WIPs. There will be prizes too for some of those who complete projects on their list!
I have several WIPs that need to be revived, but I’m going to narrow it down for the first quarter. On my list are:
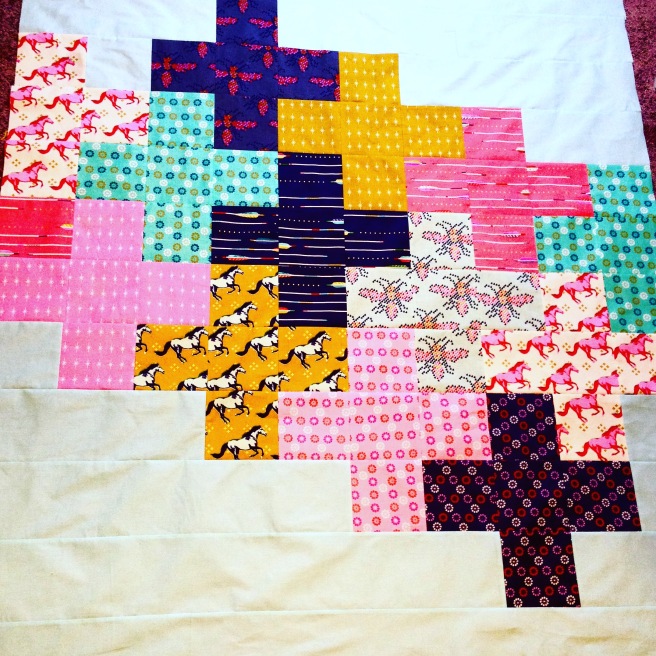
The Cotton + Steel Mustang Quilt-The quilt top is completed, and I just need to quilt and bind it.
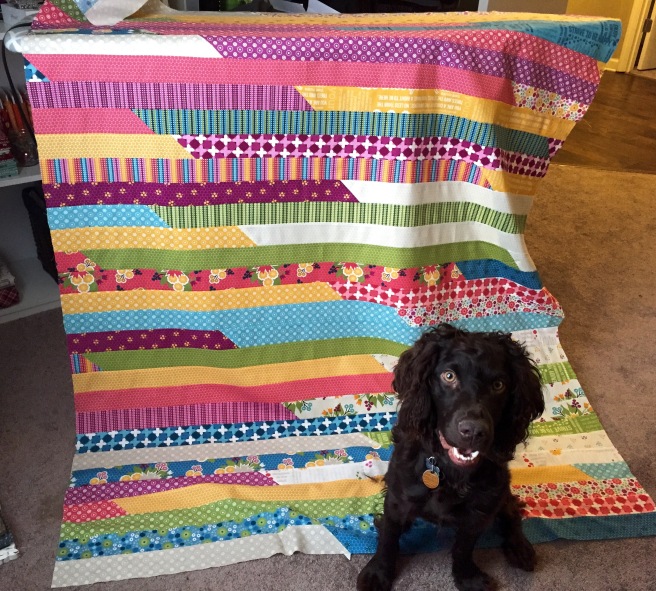
The Meadowbloom Quilt-Again, I have a completed quilt top. It just needs to be quilted and bound.
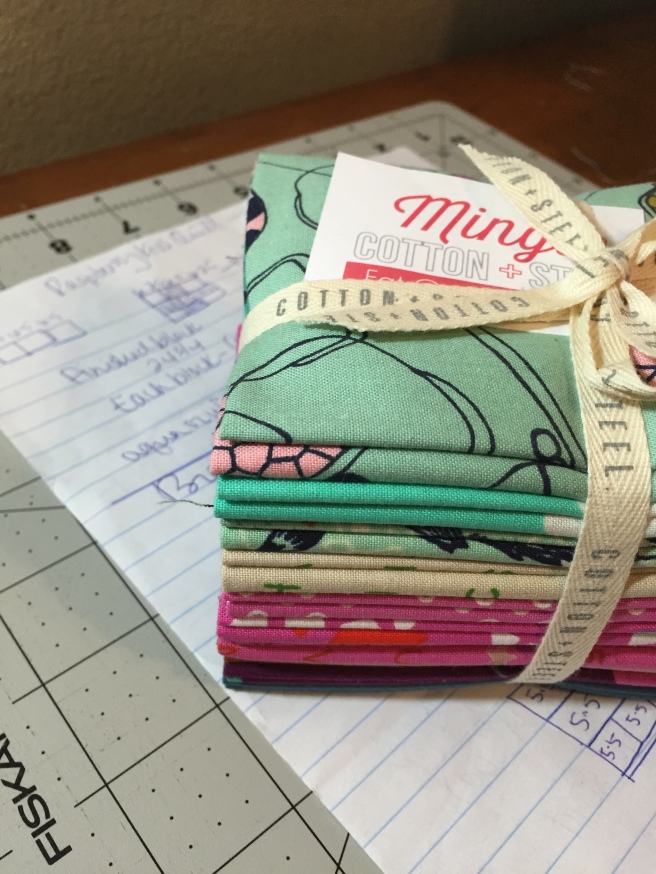
Jumbo Raspberry Kiss Quilt-This project is currently a fabric pull and pattern. I have enlarged the original Raspberry Kiss block. My plan is to use this Mingle fat quarter bundle and a light gray as the background. This quilt will be for a teenager, and I’m hoping to make it large enough (at least twin sized) so that she can take it to college in the fall. This is one I may have to send off to be quilted. I’m not confident in my ability to tackle a quilt that large yet!
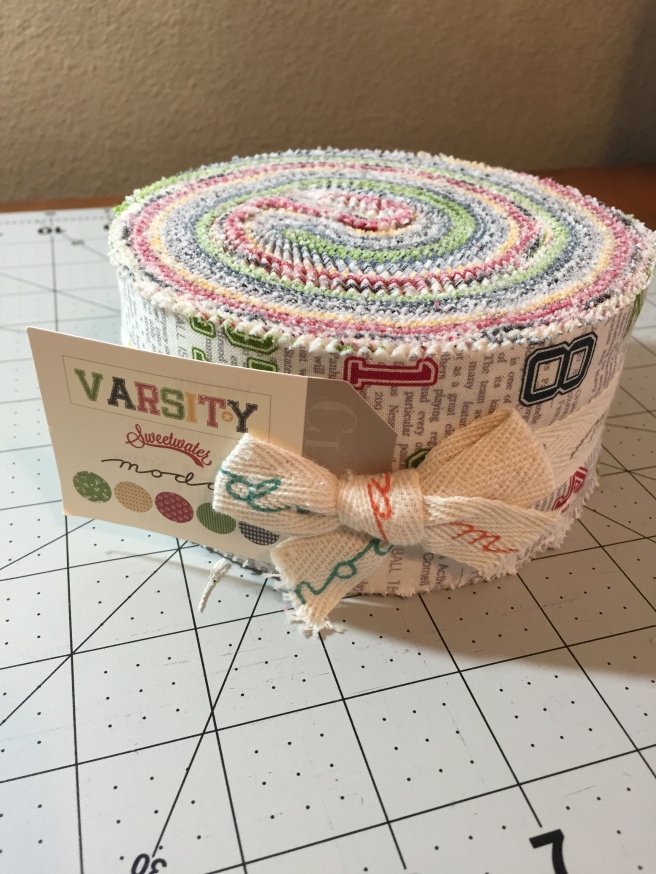
Varsity Rail Fence Quilt-I have this jelly roll of Varsity fabric. I’m planning to make this into a quick rail fence jelly roll quilt with 6″ finished blocks.
I’ll be thrilled if I can complete all four by the end of March!
Hi everyone! I’m new to the blogging world, so bear with me in my first somewhat “instructional” post 🙂
What you’ll need to make this quilt (my version):
16 fat quarters
batting (45″ x 60″)
1 1/2 yard backing fabric
1/2 yard binding (or scraps from the 16 fat quarters)
Bowl or template (to make your circles)
I used the tutorial from Allison over at Cluck Cluck Sew, and she does an excellent job of laying it all out. I did tweak it a little though. Allison uses 4 different fabrics for each of her circles. Because this fabric is sooooo adorable, I just couldn’t bring my self to chop it up too much. I really wanted to let the fabric shine in this quilt.
I used 16 different fat quarters for this quilt, 14 from the Wildflower Meadow fabric line and 2 from the Home Sweet Home fabric line, both by Melly & Me for Riley Blake Designs. You can still purchase Wildflower Meadow here.
You can get one block out of each fat quarter. Your quilt will be 4 blocks across and 4 blocks down. I designed my block with a 11″ square and an 8.5″ circle. And you do not need a fancy template or ruler for this–Seriously, I used a large bowl for my circles!
You’ll cut one circle and one square from each fat quarter. Save the remaining pieces of the fat quarter to use for a scrappy binding!
Mix and match your circles and squares until you have the perfect layout! I love this part. I also find that it tends to take FOR-EV-ER. Of course that could be because I overanalyze everything.
Once you have your circles and squares matched up, sew the circle onto the middle of the square, 1/4″ away from the edge of the circle. There is a way to perfectly line up the circle and square pieces, which involves folding (an extra step, and one more thing to analyze), so I just winged it. What can I say, I’m a rebel!
You can use a short straight stitch or a zigzag stitch to sew around the circle. Be sure to backstitch when you start and stop. *Note: The edges should not unravel because they are cut on the bias. They will fray a little bit and give the quilt great texture though!
For this quilt I used the Quilt-As-You-Go (QAYG) method. This was my first time experimenting with this, and again (told you, I’m a rebel) I just kind of went for it.
I spray basted the square (with the circle now attached) onto my batting. I typically use Warm & Natural or Warm & White batting for my baby quilts. Then I did spiral quilting on each block inside the circle and once around on the outer edge. This really gives the circles that extra oomph. The quilting will go quickly because you’re only having to maneuver one block at a time instead of man-handling an entire quilt! I love QAYG for this reason.
Wildflower Meadow Circle QuiltAfter all of your squares are quilted, you’ll need to sew your blocks together in rows, and then your rows together to create your quilt top (with batting already attached, yay!). I use a scant 1/2″ seam when sewing together QAYG blocks. I also press seams open to reduce bulk. After pressing, you may want to clip the corners of your batting as well, otherwise you may have some extra bulk where the 4 blocks meet when you sew the rows together.
Next you will attach your backing. I use 505 Basting Spray for this. I attached the backing by sewing 1/4″ away from the seams of each block, creating a grid. This attaches the backing, but doesn’t take away from the spiral quilting on the circles.
Then you’ll square up your quilt top and attach the binding. If you’ve never sewn on binding before, Allison has a great tutorial on that too! I made a 2 1/2″ scrappy binding out of the fat quarter scraps.
Voila! That’s it–simple and quick! You’re quilt should measure about 44″ x 44″. Now, go wash and dry it to get that crinkly quilty goodness! You’ll probably have some threads to snip after washing those raw edges!

![IMG_6148[1]](https://fatfannyfern.files.wordpress.com/2015/09/img_61481.jpg)


![IMG_6146[1]](https://fatfannyfern.files.wordpress.com/2015/09/img_61461.jpg)
